It’s fun to be able to make your own watercolor cards. It is quite easy to do. And once you know how you can make any amount of them for family and friends for all occasions.
To make a watercolor card you need to either buy the cards or cut the watercolor paper to size, Decide on your design and where to place it on the card. Draw and copy your design onto the paper, paint your design in your chosen colors. Add your wording.
I have explained how to create and paint your watercolor cards below. I have also made 3 easy-to-paint designs iwth step by step instructions for you to try for yourself.
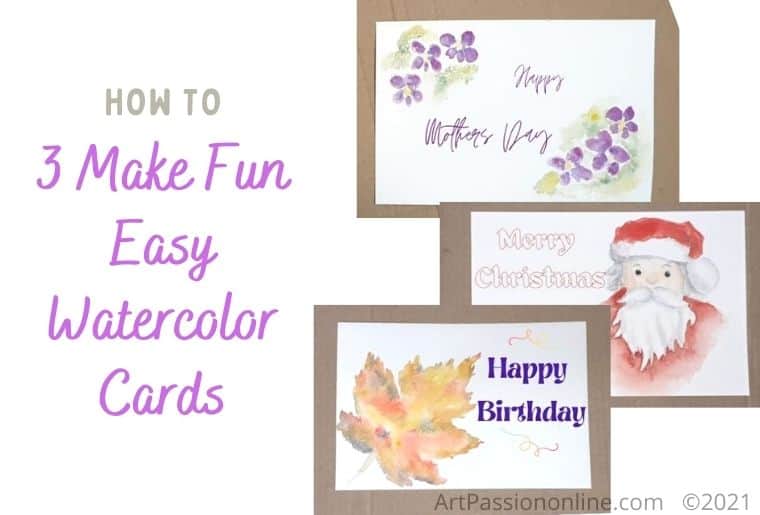
A Step By Step Guide On How To Make These Fun Watercolor Cards
Art Supplies
- Watercolor paints – colors I used are in each section
- Palette
- Round watercolor brushes various sizes. They don’t need to be too big if you are doing a small card
- Watercolor paper or pre cut watercolor cards
- Art tape (low stick masking tape)
- Pencil
- Eraser
- Ruler
- Water
- Kitchen paper
- Something to cut your card with if you are cutting them to size (explained below)
Optional scoring board or clean crafting mat (if you don’t have one don’t worry just be careful where you choose to score your cards and what with.) Don’t get one especially, only if you think you are going to make a lot of cards.
Scoring pen or embossing tool (I used an envelope opener).
Step 1 – Cut Your Cards To Size
If you haven’t bought pre-cut cards you will need to cut your paper to size
Card Size Tip: If you aren’t going to make your envelopes make sure you cut your cards to a size that will easily fit into a standard size envelope.
To cut your cards you take your paper.
To cut your cards to size you need either scissors, a craft knife or a guillotine.
Scissors
I have used scissors before but they are not the best method to use to cut your cards. It is very difficult to get a straight unjagged line with scissors.
Crafting Knife and Mat
If you are using a crafting knife you also need a crafting mat to rest your paper on while you cut it and to measure the size and cutting point.
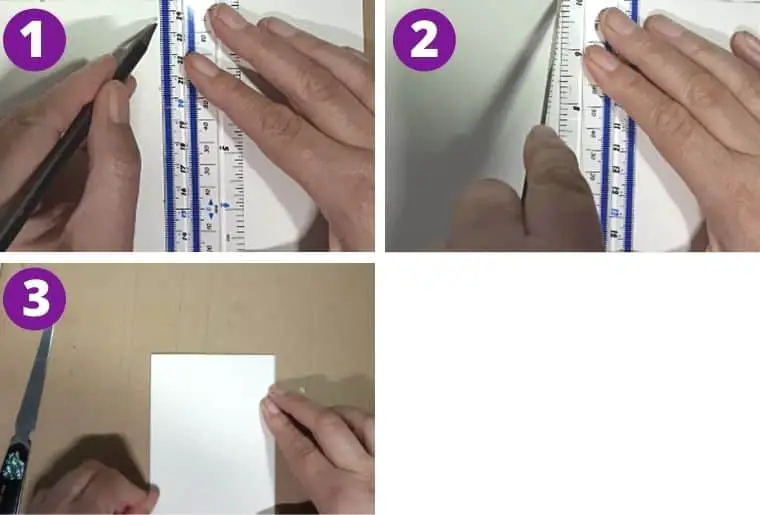
To cut with a crafting knife measure your card size and mark where to cut.
Place your ruler on your paper where you want to cut it and hold it firmly.
Carefully guide your knife along the edge of the ruler. Its best if your ruler is metal just in case the knife cuts into it. Keep hands behind the knife for safety.
Guillotine
A guillotine is the best way to cut your cards as its quick and easy and the straightest way measure to cut an accurate line. You can buy them for around £/$10- £/$20 depending on which one you get.
To use your guillotine simply measure the full size of the card and slip it into the guillotine and cut. Your card is ready to score.
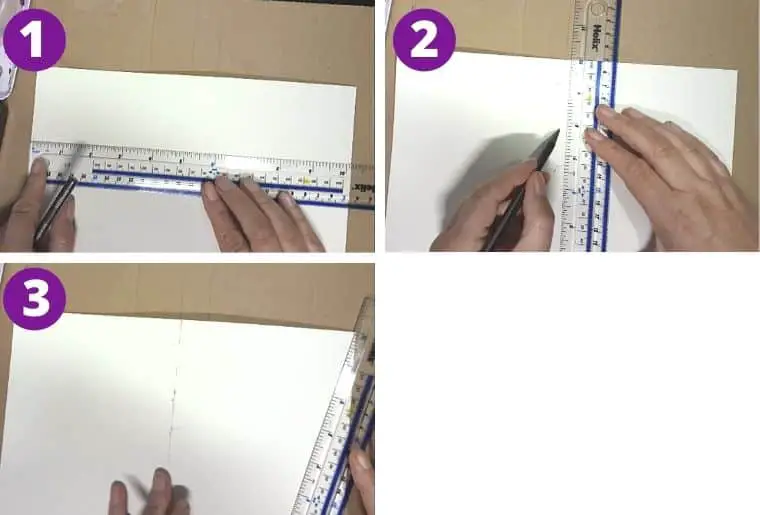
1 Measure the length of your card. For this card it needs to be half the size. So I measure the length of the card and half the measurement to find the middle. I then mark the top, middle and bottom of the center with 3 dots. I then measure again and correct any mistakes (measure twice cut once).
2 & 3 I then draw a line through the dots to make sure that they are arcuate and where I want to cut. Cut the line with your knife or scissors.
Step 2 – Score Your Card
If you don’t have a scoring tool and mat you can use anything that is sharp and thin enough to score but blunt enough not to cut your card. I used a letter opener for this exmaple.
- Mark out your card the same way you did for Step 2.
- This time instead of cutting the card we only want to score it enough for it to bend. If you are using a letter opener be careful some will cut through the card or make it quite weak where you score it if you score too hard. Use your ruler as a guide score your card down the center to help ot bend accurately and easily.
- Bend the card over and lightly run your fingers down the spine to make sure it is folded properly.
Step 3 – How To Design Your Watercolor Card
No matter what your subject there are a few things you can think about before you start. Don’t worry too much at this stage just enjoy making your card. However, if you really get into card making you might like to think about the layout and positioning of your cards.
Size And Shape Of Your Card
What size are you creating and what shape?
The Card Shape
The shape of your card can make a difference to what you put on it and where.

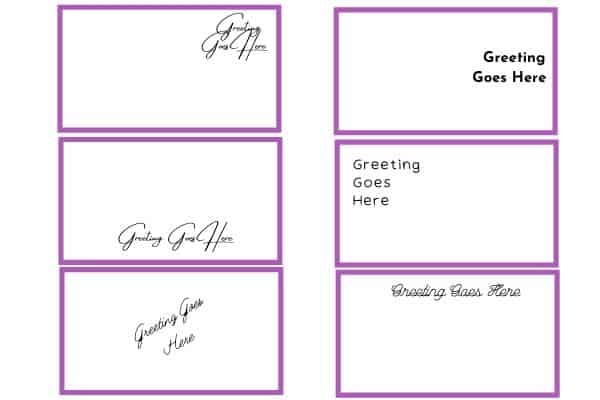
Usually cards are square or rectangle, landscape (left) or portrait (right). It really depends on how you want to design your card and what you are putting on it. People tend to be portrait while scenery is usually landscape. However, it also depends on where you want your writing.
The Use of Blank Space In Your Card
This is something a nearly always forget. With cards, you need to leave or design into blank space for where you put your chosen greeting or poem, etc.
If you forget to leave space for writing don’t worry about it just use the inside of the card only.
Ideas Where To Put Your Greetings on Your Card
Step 4 – Decide On Your Design
Think of something that suits the person you are making the card for. For instance, my mum loves poppies and violets.
Or think of the person’s favorite colors. Or the colors of the season.
What hobbies do they do? Do they have a pet they love?
What type of card is it. A birthday, Xmas or other holiday or religious celebration, Easter, mothers day, congratulations, Halloween, or sympathy, etc?
Design with these things in mind. You can keep it very simple.
If you are not confident with painting design you can always keep your card abstract and do shapes and use a stencil for the words.
Design Tip: Remember to leave a space where you want to write your greeting.
Keep the design simple.
Note: For the writing, I have put it digitally for the examples as it’s best to leave a card blank until you need it unless it is specifically for someone.
Design 1 – Abstract Autumn/Fall Card or Easy Autumn Leaf Design
For this design, I am doing fall (autumn) colors.
Decide roughly the shape you want to make and where you want it on the paper. You can do this as an abstract or you can create a shape to put your colors in if you prefer. A leaf would be great. Maple, sycamore, etc make interesting shapes.
If you are drawing the leaf draw this or copy it on first. The leaf shape doesn’t have to be perfect this is a loose fun design.

Take your card. If you are taping it to your surface you can do that.
Gather your colors together. The colors I used are:
- Scarlet Lake (Cadmium red) Any bright warm red is fine.
- Ultramarine blue. A mid warm blue.
- Yellow ochre. A deeper warm yellow.
- New Gamboge. This paint is a combination of Diarylide Yellow & Isoindolinone Yellow. You can use a cadmium yellow or other lighter to mid warm yellow.
Water down the colors on your palette. You do not need to mix them. For this picture, they are going to mix on the card. Note the colors will dry much lighter. You can see from the pictures the finished work is quite a bit paler than the wet color so don’t make the colors too weak.
For this picture, I am doing wet on wet painting as it suits the abstract design perfectly.
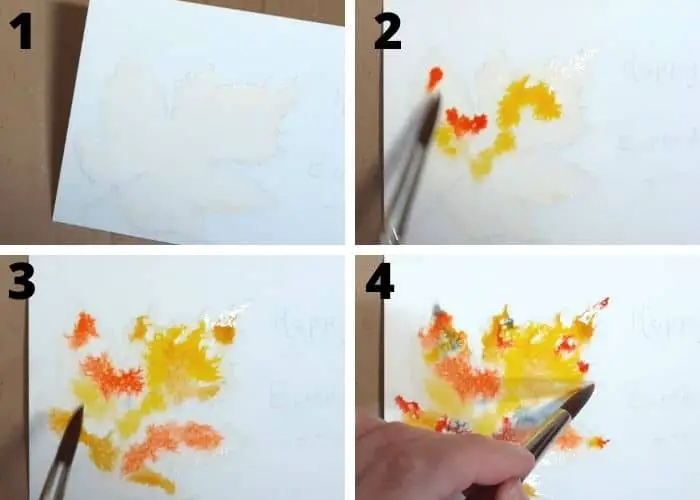
(1) Wet the area you want your design to go on with your brush with clean clear water. (To show you more clearly I have tinted the water slightly so you can see better, but clear water is best.
Allow the water to soak into the paper until it is a soft sheen rather than shiny if you don’t want the color to spread too far.
There are two ways to do the leaf
- Keep your water in the leaf shape.
- Or paint the general area and pen in the leaf shape afterward allowing the paint to flow over the edges.
(2) Now add your colors to your leaf shape.
To do this pick up the lightest watered-down color and gently drop it into several places on the leaf.
(3) Rinse your brush out and pick your next color down and do the same. Try to put the next color in different areas to the first.
(4) Continue with all your colors. Allow them all to mix.
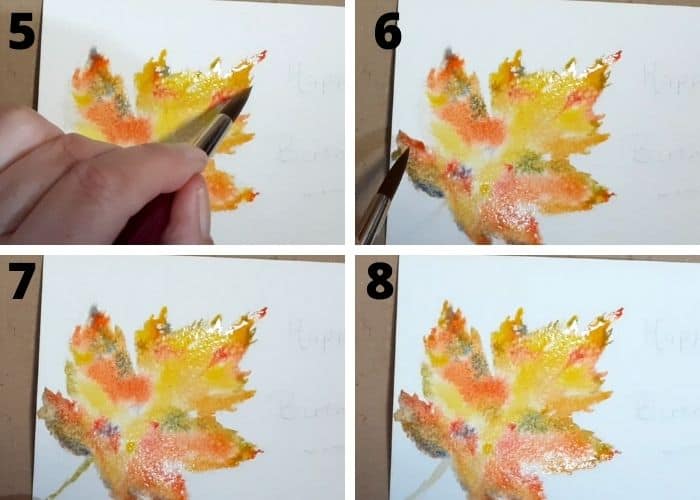
(5) I went over and made sure I was close to the leaf edges after putting the colors down without going into the other colors.
(6) Adding some final touches of darkened edges.
(7) Add the stalk
(8) Check you are happy with your color mixes and add any extra color to empty areas.
Leave your leaf to dry.
When your leaf is dry you can pen around the edges or leave it as it is. You can also add any lines for leaves if you want.
Write in your greeting and your card is done.
Design 2 – Make a Pretty Voilet Watercolor Card for Mothers Day or Birthday
Paint these very easy-to-do pretty violets. If you don’t like violets swap them for something else. The shape is very generic. You don’t have to be accurate for these it’s just an impression. Simply change the centers to make them more circular. Change where the petals are or add more and change the color of the flowers and the leaves.

The colors used for this project are:
- Purple lake (you could easily use violet instead or mix a pink and blue (not red and blue though)
- New Gamboge Yellow (or use cadmium yellow)
- Scarlet Lake (cadmium red)
- Ultramarine blue
- I mixed my light and dark greens from the blue and yellow with some red
Techniques used wet on dry and wet on wet.
Important note: For the example, I wanted to show the violets both with and without the background so I painted the background last. You can paint it first if you prefer.
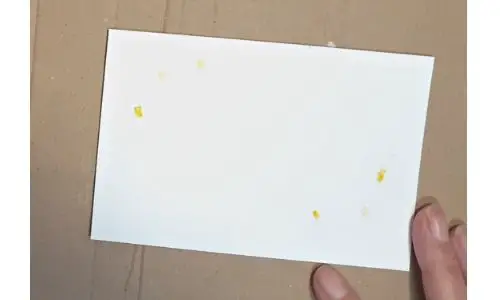
Copy your image to the card. Put in the yellow centers of the flowers.
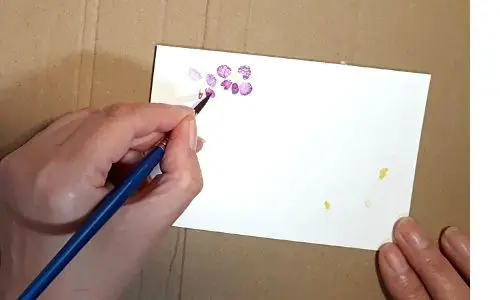
Use your lighter purple quickly circle the edges with a small amount of paint then draw it to the center of the flower.
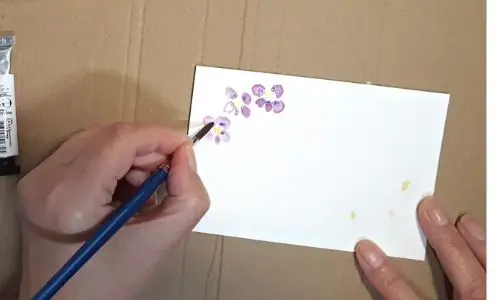
The center of the violets is slightly darker. Add a small amount of ultramarine blue as you go and the paint is still wet.
Quick Tip: If you add too much simply rinse your brush and dab it on the kitchen towel. Place the brush onto your image it will then suck up the excess paint.
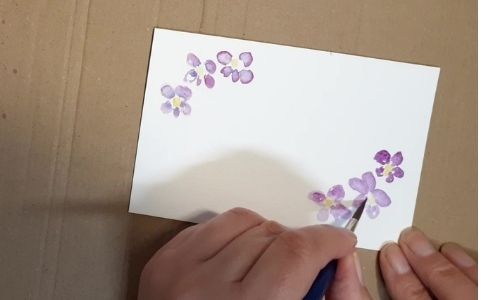
Continue until you have done all the flowers.

This is the card without a background. If you want to add the background continue below.
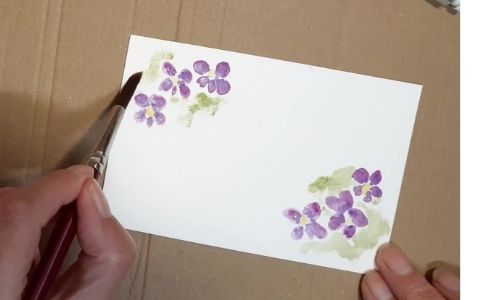
To add the background mix about 3 greens a mid, light, and darker or slightly bluer green. Start with the mid-green and add it leaving gaps for the other colors. Normally you start with the lightest color in watercolor but I wanted to do the main green first. Either way is good.
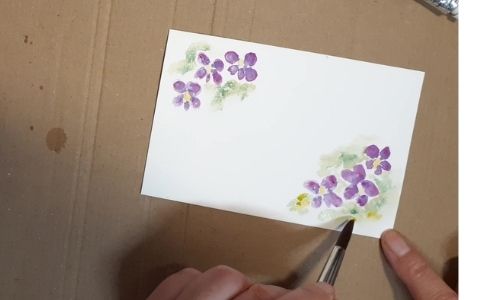
While your main green is still wet add the other greens to it where you think it will look nice. The greens will mix into each other slightly.
You can use a stencil or use calligraphy for the writing. Or just your own handwriting.
Design 3 – How to Make An Easy Santa Watercolor Card
For this project, we are painting an easy cute Santa design. Nothing too complex and it’s fun to do.

Paints I used:
- Scarlet lake (cadmium red) or other warm Santa red
- Ultramarine blue
- Yellow ochre
- Lampblack
Step 1 – Sketch Out Or Copy Your Santa Design Onto The Card
Create your image on your card in very light pencil.
Step 2 – Paint Santa’s Face Color

Mix together the red, yellow, and a very small touch of blue to make your preferred skin tone. This needs to be very watery. You might find it too strong. If so just gently dab off the excess color when you apply it to his face.
Add a slightly darker color to the edges of the face to give it form.
Step 3 – Next Paint Santa’s Red Hat And Coat

Use your cadmium red/scarlet lake to paint Santa’s hat and coat.
The Hat
It doesn’t have to be a solid color some areas can be lighter so it looks more like fabric.
The Coat
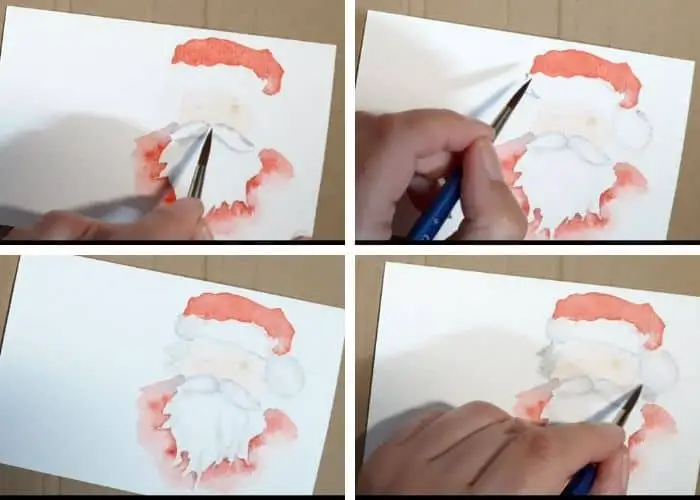
Now use red negative painting for the beard (paint around the shape rather than in it). Then paint the edges of hat rim, and pompom with gray. Then draw the color into the shape with your brush.
I mixed together gray using blue, red, and yellow and watering it down. Mix plenty so you don’t have to remix as you might not get the same color again.

Face Details
Add the eyes, eyebrows and nose.
I added the eyes in black. I mixed the eyebrows color. You can add a gel white for the eye sparkle if you want to. The nose is a darker skin tone placed on the image in a little C shape then blended in so it looks part of the face.
Finally, I went over and darkened down the shadowed areas and added more red to make the image stronger.
Being as this is for Christmas you could always spice up the card with some silver glitter from a glitter pen.
