Going mini with art means knowing how to paint on your mini canvases. This is such fun and is easy to create compared to other art.
To paint a mini canvas gather together your painting tools and colors. Prime your canvas. Decide on your picture layout. Mix your colors and paint your scene starting from the background and work forward.
Going mini can be fun. Here I share how you can paint mini with this easy to do painting seascape project.
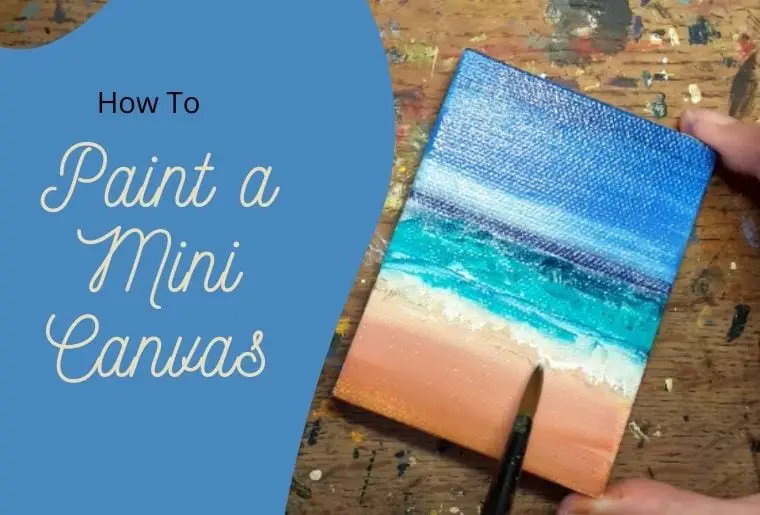
Paint On A Mini Canvas With Easy Seascape Project Example
Painting supplies list
- Mini canvases. I prefer rectangle but what ever shape you want. for this painting my size is 3 x 5 inches ( 7.6×12.7cm)
- small acrylic brushes
- Water container with water
- Kitchen towel or other cloth to wipe the paint
- Acrylic paints – Colors warm red, cool red, warm blue, cool blue, warm yellow, cool yellow and titanium white*
- Retarder (optional but easier)
- Primer (optional but preferred)
- Pallet knife or Ruler
- A palette or stay wet pallet
- Masking tape if you have it
*I’m using a limited pallet as these colors or similar ware what most starter packs will have in them.
What Are Mini Canvases?
Mini canvases are canvases made for acrylic or oils that are made the same as or similar to large canvases and of the same material but are only 6×4″ (15cmx10cm) or smaller in size.
I thought I knew what they were until one day I was in a hurry and ordered some mini canvases and ordered the wrong ones by mistake as they came up in the search and are described as mini canvases. The canvases that came were 5″x7″ (12.7cm x 18cm). Argh! Too big, lol. So, I double checked. According to Craftsy mini is anything under 6 x4 inches (15cmx10cm).
I don’t know if there is a mini canvas standard somewhere or if its just individual choice but for me 5 x 7 was more small than mini so I tend to agree with this. So just double check when ordering your canvas like I should have!
Get what size you are happy with.
What Brushes To Use to Paint Your Mini Canvas
If you re doing a painting without much detail you can get away with smaller normal sized brushes. If you decided you wnat more detail you will need smaller brushes and detailing brushes than you would youse in a normal canvases.
I hav ea set of mini brushes for acrylic. For this painting I used use normal brushes as its fairly straightforward.
What Paints To Use On Your Mini Canvas
For mini canvas I just use the same acrylic paints that I use for larger canvases. You can also use oil if you prefer. I have a range of different brands that I have collected over they years and use for different things.
The great thing about mini canvases is unless you are doing very fine detail they are quite quick to do. This helps with the annoyingly short drying time of acrylic paints as you don’t have to worry as much about the drying times as you are only working on a small area.
This means you don’t have to spend out on the expensive longer open times brands. Any good quality student or artist quality paint will work well. I often use System 3 acrylic paint by Daler Rowney. If that isn’t available where you are or more expensive swap it out for another brand of equal quality made locally.
Step 1 Decide What You Want To Paint
Keep what you want to paint simple to start with. Mini canvases are tiny so you have two things you can do you can keep things simple or you can paint everything in minute detail as you would a large painting. I’ve seen people use magnifying glasses to do paintings even smaller than the ones I do.
As a beginner to mini paintings, you want to keep it simple until you get your bearings. Also, too much clutter can ruin your painting.
I like to start with simple beach scenes and galaxies. Then add a simple picture of flowers.
For this example, I am creating a simple seascape beach scene. The sea can be a very complicated subject. For this though I am keeping it very simple.
Step 2 – Choose Your Focus Object
For your first picture, you might want to skip this stage. However, if you have a focus object it can give added wow factor, depth, and a sense of size to your painting.
Below are examples of popular objects for beach scenes.

Oops forgot the palm tree lol. Palm trees are also popular.
If you are adding a focus object it’s a good idea to decide now so you know where you want to put it and there’s space. A good location is in the bottom right of the picture. This draws the eye in and across.
Step 3 – Prime Your Canvas With Gesso
You can paint acrylic directly onto your canvas. However, it is better to prime your canvas with gesso first.
If you have some gesso you can prime your canvas. If you are new to painting you might not have this or want to get it that’s fine for now. But I recommend that once you get into mini paintings you get some gesso. Even if the canvas says primed it’s a good idea to add a couple of layers. It really helps with the first couple of layers.
White gesso is the best for most things. You can also get clear or black gesso.
To prime, your canvas simply paint the mini canvas and the canvas sides with your gesso.
Smooth it over with a palette knife or ruler.
Allow it to dry.
Repeat a second time.
Step 4 – Decide On Your Picture Layout
Decide on your beach scene layout. This rule of 3rds applies to most subjects you paint.
Don’t split your canvas 50/50 for the best images split your canvas into 3rds.
- 1/3 sky, 1/3, water, 1/3 beach
- 2/3 sky, 1/3 beach (water strip)
- 1/3 sky, 2/3 beach
- 2/3 sky 1/3 water
Step 5 – Use Masking Tape for Your Horizon Line
Tape of your horizon line. It’s a good idea to tape off your horizon line. that way you know it’s straight.
To do this decide on where you want the sky to split from the sea. (see above for best layout proportions) measure your canvas and mark off both sides with a pencil (very lightly)
Take your masking tape and fix it across the canvas to both lines below the horizon line. That is in the sea or beach area so that you separate the sky from the water or beach.
It gives you a clear straight line to work with.
Step – Mix Your Colors
Mix your colors for your painting. Keep it to as few as possible. A limited palette of 6 colors plus white will work well.
Sky
Water
Sand
Focus Object Colors
Don’t mix your focus object colors now. Just make sure you have them ready.
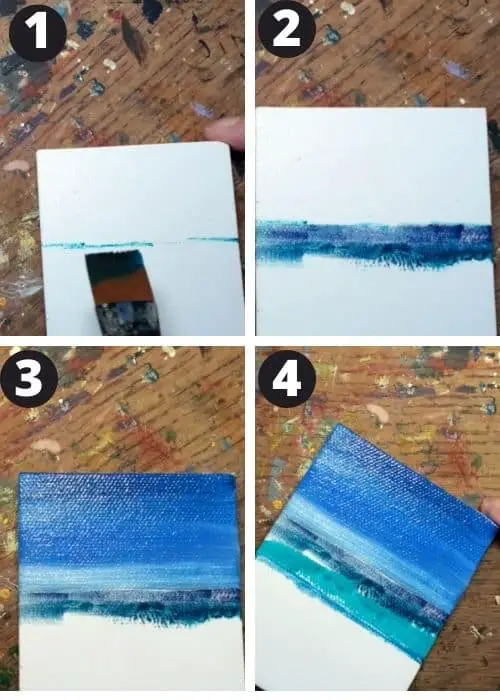
Step 1 – Masking Tape Or Paint In Your Horizon Line
First create your horizon line. For this painting I am using a 2/3 high horizon line with the painting split between 1/3 or each sky, water and beach. As its a small painting I didn’t use masking tape. But tape is much tidier.
Step 2 – Oops
I started the water instead of the sky here. The correct way is to start from the back and work forward. If you make a mistake like this simply leave it to dry you can paint over it later. Or in this case I just used it.
Step 3 – Paint Your Sky
To keep things simple we are going to paint a fairly straightforward sky.
Skies typically go form dark at the op to lightest near the horizon.
Start at the top of your canvas. Paint the darkest blue color across the top.
Then your mid blue
With a clean brush paint the lightest blue along where the masking tape or horizon line is.
Blend your colors gently where they join. So that the overlap is soft. Paint upward towards the darker color so you don’t drag the dark color downward.
Step 4 – Paint Your Water
choose the color of water that is right for your picture for this one I am creating a beautiful turquoise.
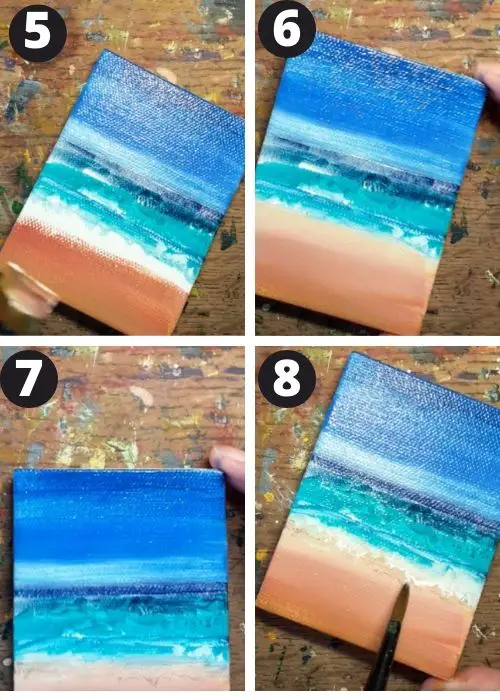
Step 5 & 6 – Paint Your Beach
To paint your beach paint your darker brown first
Cover the bottom of your canvas up to your ocean
then create a beige and put this on top of the dark brown while it is wet. Start at the waters edge and blend downward. You don’t want this too even as the sand will be wet and will vary in color
Step 7 – Paint Your Highlights
If you want to add 3 thin rows of broken white foam you can add that now. No more than 3 though and do not go too far back into the dark area of the water.
Step 8 – Add Your Breaking Foam
Finish by adding your breaking foam at the waters edge. To keep it simple this is just an indication of the foam. Add some white to your blue and paint along the edge of the water. Blend it in. then add pure white in splotches. Dab it on to the edges. You don’t want this even all the way along and it can splash up in areas.
Don’t worry too much just dab it on it will look fine.
You are finished. Mount your mini canvas on a mini wooden tripod and you are done!
