When painting with acrylics on canvas sometimes you will want your paint to look silky smooth and not have brush strokes, texture, or be raised. Or you want objects within that painting to look smooth. There are lots of different techniques you can use to do this.
There are several different ways to make your acrylic paint look smooth on your canvas. You can prime the canvas in a specific way to make it smooth. Use brushes that don’t leave marks. Use specific blending techniques. Use a gloss varnish. etc.
There are lots of different things you can do to make your paint look smooth. This depends on what you are looking for, whether it be the whole painting looking smooth or individual parts where you want a smooth texture in your picture. What technique you use and where you apply it depends on what look you aim to achieve. Below I share some ideas and techniques I have found while painting that you can use to make your paint look smooth. You may want to use several together or just one.
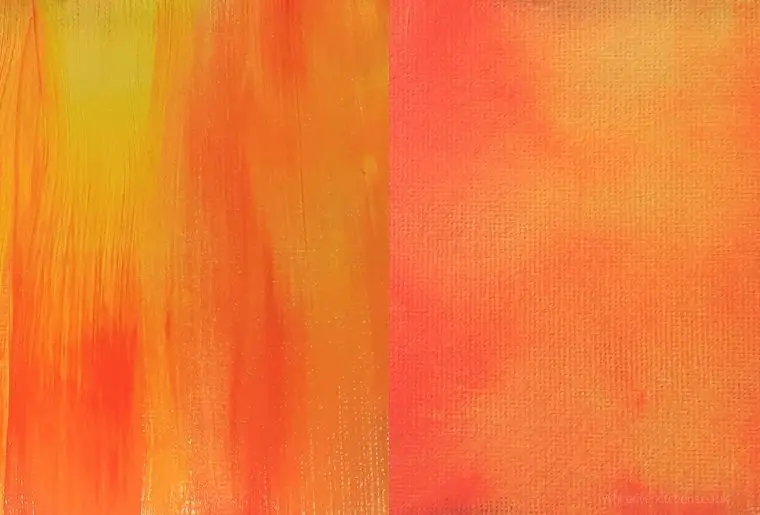
10 Ways To Make Acrylic Paint Look Smooth, On Your Canvas
To make your acrylic paint look smooth on the canvas you need to make a few changes to the tools and techniques you use at each stage of painting. When you combine several simple techniques it all adds up to a smoother look when you have finished.
You don’t necessarily need to use all of these techniques all of the time. It may be that only one works for you like a change of brushes or paint for example.
How To Prepare Your Canvas So Your Paint Is Smooth
Depending on how smooth you want your paint to look on your canvas you can choose to do this stage or not.
If you want smooth paint but are happy to see the canvas weave you can leave out this stage. If you want a super smooth finish then I recommend that you do this stage.
You need to gesso your canvas in a specific way. This technique is different from what you would normally do with a couple of coats of gesso.
- What you do is add a couple of coats or so of gesso and build up to a smooth layer. The aim here is for the gesso to fill all the holes and create a completely smooth surface.
- Using an old credit card, ruler, or similar item smooth the gesso over the canvas making sure there are no lines, dents, or dips. This layer is thicker than you would normally use. Make sure it is completely dry before adding another layer.
- Gently sand your canvas smooth with fine sandpaper. Take safety precautions to make sure it doesn’t get in your eyes, nose, or mouth. Some people prefer to wear safety goggles & masks.
- Make sure your finished piece is ‘dust-free’.
- When you are finished you should have a completely smooth surface to paint on.
I found this video on YouTube it is very similar to how I would gesso a canvas. He has used a large scraper. This is way better than a smaller scraper as it covers lots more area in one go making it easier to cover your canvas. It will also make your gesso smoother to start with, meaning less work to smooth and sand it down.
It doesn’t even look like he sands which is fantastic as it saves even more time and effort which means you can get to your painting sooner.
If you don’t want to go to all this extra effort to make your canvas smooth you have two options.
- You can use canvas gessoed like normal or
- Some people prefer to start with a stiff board as it is easier to smooth. You can use a canvas board and gesso that or even just a board and prime it.
Choose The ‘Right’ Brushes For A Smooth Finish
The brushes you choose make a big difference to the outcome of your painting. The best way to get a smooth look and avoid brush strokes is to pick brushes that create that look.
Make sure you pick smoother softer (but not super soft) bristled brushes and not the stiffer ones. Stiff bristled brushes leave brush marks. Even if you can smooth them out it’s a pain. Even if you are going over the top with a blending brush it’s still better not to use a stiff brush first as it reduces the workload. With many types of acrylic paints being fast drying you don’t want to spend unnecessary time blending.
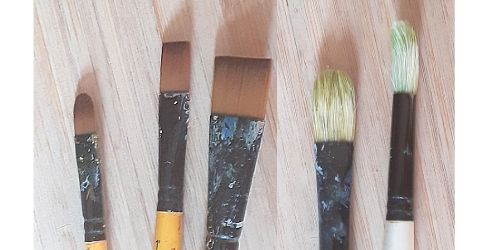
Longer bristles also are an advantage as they help to reduce marks and help the paint to go on the canvas more smoothly.
You can clearly see the differences here in this picture between these two types of brushes. The ones on the left are really smooth while the ones on the right are much rougher. These are more likely to leave texture and brush marks.
You can also use a soft mop brush to smooth out any brush strokes to make the painting look smooth. I use a watercolor mop brush (blending brush) as well as acrylic ones.
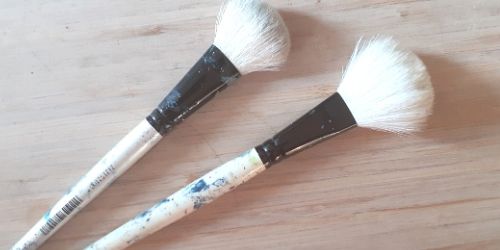
It’s probably a bit too soft but it works well for me. Find one that suits you. You can get acrylic and blending brushes. Some have round heads while others are oval in shape.
If you can get them round heads are better for this purpose in my view.
Paint To Use To Get That Smooth Finish
The choice of acrylic paint you use makes a big difference in how it acts while you paint. You can get a smooth finish with the thicker heavy-bodied paints. However, they are not designed for this; they are meant to act similar to oil paints. The thicker acrylic paints are more likely to hold any brush strokes that you do while painting.
It is much easier to get a smooth look with your paints if you buy either fluid acrylic paints or high-flow ones rather than use the heavy-bodied ones. Although of course, you can thin down the heavier-bodied acrylic paints.
As a general guide, the more fluid acrylic paints come in bottles rather than tubes. This isn’t always the case though as the ones I have used in the past come in both. They were somewhere in the middle of fluid and heavy-bodied. It should say on the tube or bottle or on the website which they are.
By using the thinner paints you won’t need to thin them down as much, if at all depending on what paint you use. This is an advantage if you are going for a smooth finish.
Thicker Or Heavy Bodied Paints Need Extra Help
If you have thicker heavy-bodied paints that aren’t designed to flow you will need to thin them down to make them flow better. To do this you need to use either water or an acrylic medium.
For a smooth finish, I recommend that you get an acrylic medium rather than use water as when you use water it soaks into the canvas while the acrylic medium lets the paint on top. This results in a smoother finish and a glossy look (source).
Paint Drying Times Can Make for a Rough Finish
The advantages and disadvantages of acrylic paint are the speed at which it dries. They dry quickly. This is great but it limits your working time. If you want a smooth finish it is an advantage to have a longer drying time as this gives you more time to work.
Fluid acrylics take longer to dry than the heavier-bodied acrylics so this should not be an issue. For those using heavy or mid-bodied acrylics, this can be an issue not only for the overall smoothness of your painting regarding brush strokes but also in the actual blending techniques. Use more fluid paints for easier smooth painting or use a medium to smooth it and blend better.
Slow Down The Drying Times of Your Paint
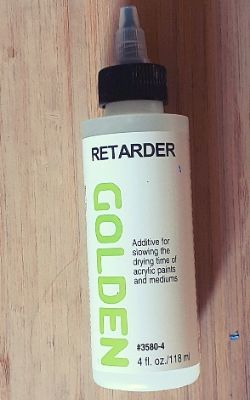
If you are using heavy-bodied or thicker acrylic paint and not fluid paints or open acrylics you can also use retarder.
Retarders help a lot with smoother blending which helps to remove sharp edges and in turn makes your paint look smoother on your canvas.
This works wonders to reduce drag and give an overall smoothness to your applied paint. It’s also perfect for making soft fluffy clouds and is great for blending mottled backgrounds.
The Techniques You Use Make a Difference to Smooth Paint on Your Canvas
We’ve looked at the art tools and how they affect how smooth your paint is or your artwork actually looks. Now it’s time to cover a few of the techniques you can use while painting to add to this to make your paint either look or be smooth.
Here I have given an explanation with some examples, however, some of these methods are whole subjects in themselves and need further study.
How to Have Fewer Brush Or No Brush Strokes
A good way to get a smooth look if you are covering more areas of your canvas is to use a larger brush. By using a larger brush you cover more of the surface of the canvas faster and in one go. This means less chance of brush strokes. It also means that your paint is less likely to dry allowing you to smooth out your acrylic paint better and avoid brush drag which is a pain.
You can use this technique to make your paint smooth or parts of the painting soft and smoothed out. This is great for blurred soft backgrounds, soft fluffy clouds and simply covering large areas of the canvas with fewer marks. It gives your paint an overall smoother look.
If like me you are using thicker-bodied acrylic paint rather than liquid paint, or acrylic paint with a short working time, combine this technique with the use of a flow medium like I discussed above to smooth your paint. This will give better results. Also, combine this technique with the next section on blending.
A Quick Overview On Blending

I touched on blending before under tools. A good way to make your paint look smooth and soft is to use a blender brush or a mop brush, and gently go over the surface of where you are painting in a to and fro as angles, crisscross, or circular motion. This removes some of the paint and softens the edges and gives a smooth mottled effect.
The brush should be soft-bristled and dry. The paint will quickly build-up, up on the bristles as you work. You need to constantly wipe off the excess paint from your brush on a cloth or the technique won’t work.
As you can see in the YouTube example below blending helps with the overall smooth look of your paint on your canvas. There are many different ways to use this technique.
Make Objects Smooth Within Your Painting
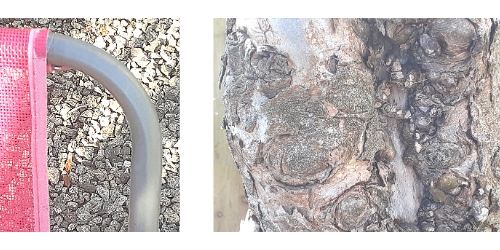
If you want your actual objects to look smooth like they are metal or glass make slower value transitions.
If you compare fur or tree bark with glass, enamel, or metal you can see a big difference in the way the light falls. With a rougher surface, there are more areas of dark or light in the painting. These may be rough or soft depending on what you are painting. With smoother objects like glass or metal, the value (from dark to light) is much slower overall. There can also be a strong sharp-edged highlight.
As you can see how to make acrylic paint look smooth on canvas from this example the image to the left with the metal bar has more gentle transitions of values from light to dark and looks much smoother than the one of the bark on the right with more frequent or stronger value changes.
Finish Your Painting With A Smooth Glossy Finish
A good way to enhance the overall smooth look of your painting is to varnish your finished work with an acrylic gloss varnish. This adds to the smooth effect you are aiming for. Make sure the varnish is meant for acrylic paints as this will give the best results.
An alternative would be to use a matte varnish (or some artists say no varnish) and place it under glass.
How you finish your artwork is very personal to each artist and what you are painting. This is not a strict one way is the right way rule.
If you don’t like a gloss then use matte, in y view satin leaves a slight shimmer that will detract from the overall smoothness. Don’t get me wrong satin is my favorite finish, but just not here.
How Do You Paint Acrylic Paint Without Streaks?
If you want to make your painting less streaky or streak-free there are several ways to do this. You can learn more about this in my article on how to paint streak-free.